The editor splashed his cash on his FJR1300, because she’s worth it…
Words & photos by: NIGEL PATERSON
I’ve written about my preference for multiple cheaper motorcycles in my garage to one higher-priced bike, but when it comes to upgrades the economics are harder to justify.
Spending thousands of dollars on suspension on a bike only worth around $5000 would seem crazy to most people.
But not to me.
For a start, I had to do something: sell the bike, repair the current suspension, buy new fork springs and a second-hand shock or new suspension all round.
Selling the bike wasn’t an option: replacing it with something else would have resulted in spending more money in the hope it would be better sprung and stay that way – my FJR’s standard suspension went from ‘acceptable’ to ‘stuffed’ inside a 10,000km window.
I seriously considered having the shock repaired – there are numerous suspension technicians around the country who will cut open a standard big bike shock, clean it out, refill with the correct oil and seal it back up again. In the past, for my FZ750, one even added a remote reservoir for increased oil capacity, but that’s relatively rare and adds to the cost.
If you’ve simply worn out your shock but are otherwise happy with it, this is a great option – you’ll return the shock to as-new performance at a reasonable price.
Buying a replacement shock second-hand from a wrecker or a classifieds website is worth considering, but you really don’t know what you’re getting, although if you can find a quality second-hand aftermarket shock which will fit, it can often be rebuilt and tuned to your weight and riding style.
And then there is the most expensive option: buying new aftermarket suspension. These days there are usually multiple options available depending on your bike, weight and riding style, but no shock manufacturer makes units to suit all bikes.
There are, however, more options than you might think: Ikon, YSS, Nitron, Ikon, Racetech, Öhlins, Wilbers, Fournales and more.


On the FJR
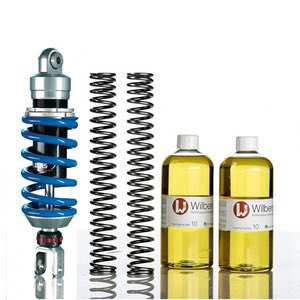
I opted for a fully-adjustable Wilbers rear shock and new fork springs for my 2005 Yamaha FJR1300.
I did this for a number of reasons, but the biggest one was pragmatic: I ride hard enough over crappy roads often enough and fast enough to know good suspension is a safety feature. If a bike can track properly over terrible roads it won’t bounce you into the trees or pogo out of control, and I decided years ago Not Crashing is the safest form of motorcycling.
Another reason for the top-quality suspension is I can move it to most other FJR models, so if I update to a younger FJR I can take the shock with me (I won’t bother with the fork springs, they only cost a few hundred dollars). My original shock will be sold with the bike.
If I don’t upgrade to another FJR the shock should be worth up to 50 per cent of its new price on the second-hand market, so that’s an option.
But most of all I bought the Wilbers because it has the quality, flexibility and adjustments I wanted.
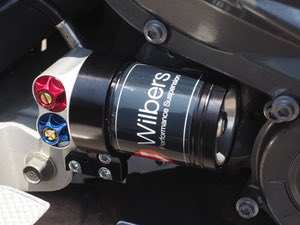
The unit has external rebound, high and low-speed compression damping adjustment, which means comfort and handling when set-up correctly, and Wilbers in Germany built the shock for my weight and riding style when I ordered it from the Australian importer, Suspensions-R-Us.
I also have it optioned with a hydraulic remote preload adjuster, so I can set it in seconds for solo, loaded, two-up and two-up loaded.


Fitting the new suspension
If you have a centre stand, removing and fitting rear suspension – single or twin shocks – is pretty easy. If you don’t have a centre stand, it can be a nightmare, because you can’t use a paddock (race) stand for this job.
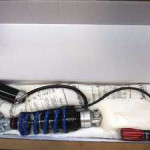
The Wilbers shock came with some fitting instructions and tips, and I did the work myself inside a couple of hours (and I work slowly, I’m not a mechanic).
The forks, on the other hand, are a different story.
There’s only 16 bolts holding the front wheel, brake callipers and forks onto the FJR, so the most difficult task was jacking up the front end of the bike.
Replacing the fork springs, seals (one was leaking slightly) and fork oil wasn’t a task I was willing to take on lightly though.
My local performance workshop, Sportcycles, has the tools, skills and expertise pulling apart forks I don’t have, so with the forks in the back of the car we were off to the Whitebridge (NSW) shop.
Sportcycles’ Jamie Stubbs has been making bikes work better for decades. He started on the FJR’s forks by examining them, immediately noticing the oil leak.
The first task was disassembly, which required some special tools, a rattle gun and vice… the top bolt was cracked, the bottom bolt holding in the fork’s cartridge removed, the oil and spring tipped out, then the slider was separated from the stanchion with a bit of brute force.
Then everything went into the cleaning unit for a through wash and examination, where we discovered a previous owner had done some work on the forks… luckily only marks where they’d used screwdrivers,
but it reflects what can happen when home mechanics go too far in their quest to save money.
Stubbs then carefully measured the fork tubes for straightness, which they passed.
Re-assembly involved lots more special tools, including a tubular ‘hammer’ which slides the fork seals into place correctly, torquing-down the cartridge bolt at the bottom of the fork leg and setting the oil level with a glorified syringe – most forks should be set to have the oil a certain distance from the top of the stanchion, so Stubbs tipped a little more than was required in then sucked out the excess, setting the right fork oil height in the process.
The fork oil itself is Motul 7.5w, the weight as recommended by Wilbers with the new springs.
Back on the bike
With the forks back in the bike, it was test ride time… and it’s immediately better, but not my as much as most people would think and certainly not the transformation some riders expect.
That’s because fitting great suspension is the start of the process – it requires careful, methodical set-up and testing over a period of time, and in my case maybe new rubber as well, as my Pirellis are getting a bit tired (sorry).
I reckon this is why bike manufacturers are generally skipping fully-adjustable suspension (except on specials and race replicas) for semi-active electronic suspension, because pressing a few buttons on your dash is easier and more likely to be used
than the meticulous set-up otherwise required.
The first job is to set up the static sag – four times. Solo, solo loaded, two-up, two-up loaded. The hydraulic adjuster means I’ll be able to get to each setting quickly once I know what they are.
It’s almost impossible to set static sag by yourself –
you need to sit on the bike while someone else measures how much the weight of the bike, rider(s) and luggage compress the shock – you’re looking for your spring preload to be set so about 20 per cent of the available wheel travel is used up when you’re ready to roll (Australian Road Rider will be publishing articles which do into more depth about suspension set-up in the future).
Phil James help me set the static sag while I’ve stayed with the standard damping settings for the time being.
I’ve done around 2000km on the Wilbers suspension now, and I’m only just getting to the stage when I feel I can make some damping adjustments and actually improve the ride – the FJR is so much more confidence inspiring to ride, doesn’t pogo out of slow turns, settles into a bend while trail braking so much better and having high and low-speed damping means attacking rough, repaired roads never feels like wheels are skipping across the bitumen, which it has felt like in the past.
A well set-up motorcycle is a joy to ride – faster, safer, more comfortable and generating less fatigue. For those willing to put in the money, time and effort, well worth it. ARR
Links: Suspensions R Us


